I am a firm believer that each of us can paint – especially children, who possess an innate ability to create art. This tutorial is such a fun way to paint! I hope you enjoy this acrylic fall trees tutorial.

The hardest lesson is this: you cannot paint exactly like someone else. Embrace the freedom to please yourself!!

Acrylic Fall Trees Tutorial
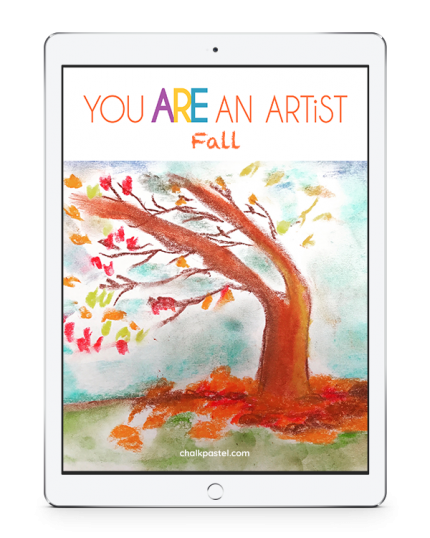
This painting is one my students and I so enjoyed! The trees here in Georgia are about at their peak of beauty, and we could not pass up the opportunity to get a likeness of Mother Nature’s art down on canvas. This lesson is called “Trees at Kennesaw Mountain” art (with a twist!) and the painting pictured above is one I painted in my art class.

This post contains affiliate links to art supplies we love. Please see our disclosure policy.
Acrylic Fall Trees Tutorial Art Supplies
- We did use Canson’s multi-purpose painting canvas. It is sold as a pad of paper and is available from Michael’s Art Store.
- We tried to pare down the paint colors with our acrylics to a basic palette of Liquitex brand: Red, green, bright yellow, blue and white. (use what you have! No special trips to the store!)

- Kitchen paper towels
- Assortment of paintbrushes
- Cup of water

Prep Your Paper/Canvas
To start the painting, we “toned” our canvas with a mixture of yellow and a touch of red to make a good orange color and covered the entire canvas with this vibrant orange. Then working quickly before the paint dried, we moistened a kitchen paper towel, wadded up just slightly, and dabbed away an area in the middle of the toned canvas for the two or three trees.

We just readjusted the paper towel to a cleaner side (still slightly wadded up, and moist with water) dipped the paper towel into the bright yellow acrylic and dabbed or pounced on the yellow paint. The idea is to create texture and to experience painting without a brush!

Create Acrylic Fall Trees with Paper Towels
Next is a paper towel (moistened) dipped into the red acrylic paint and dabbed around the yellow on your tree; do not cover up all the yellow, the idea is to show the light yellow is sunshine on the top of the trees. Next, try some green (very lightly on the bottom of the tree mass) this will show some shadow under the trees. Now it is on to the sky…you can create a sky all the way across the top of the painting using your paper towel wadded up, dipped in a combination of blue and white.

Be a bit light-handed with this color, you only want a bit of sky showing, the trees are the “stars” of your painting! *Create brilliant, light yellow leaves for your trees by mixing in white with your yellow. This makes it look just like the sunshine highlighting your fall tree.

Paint Brush for Tree Trunks
Then take your smallest and narrowest brush and dip it into a combination of green and red to make a brownish red color. This will be your trunk color for your trees. Decide how tall you want your trunks to be…and then…put your loaded brush (with the brownish-red paint on it) down on the canvas and paint UP to the tree leaves. This will make a nice, narrow trunk, and if you use enough water you can then make light and skinny limbs also.

You have to “ground” or put your trees on to something, so dip a towel into the green and dab a nice green lawn under the trees, right up to where the tree leaves start. A pile of leaves at the bottom of the trees can be achieved with your wadded towel and some of your red, green and yellow paint.

The light is coming from the right side of the painting…so you can take some of the reddish-green and put a shadow behind and to the left of the trees. This is your painting! Please add what you would like to see in the finished picture…you can add a wandering path behind the trees, go back and add some more yellow or red leaves…whatever YOU like.

We thought that paper towels made wonderful brushes!

Spatter Falling Leaves
Next we took our paintings outside. We choose several of our colors to spatter onto our painting. The spattering looks falling leaves! Nana showed us how to hold two paint brushes like rhythm sticks. A smaller one on bottom (with your left hand) and a larger one on top (with your right hand). Then, just tap, tap, tap, gently (tapping too hard will create big splotches! We want gentle, falling leaves).

Spattering was such fun! Our completed acrylic fall trees.
Enjoy!

- A note on acrylics: Just like pastels, acrylics will wash off your hands easily. But if the paint gets on any fabric – it is permanent! We wear a smock and cover our painting surface.
- Supplies needed: Nana shares all details on paint, brushes, canvases and palettes in her video Introduction and Supplies on her A Simple Start in Acrylics page at ChalkPastel.com.
- Encouragement: How to Start Art with Little Ones and How to Add in the Joy of Art.
Looking for video art lessons for all ages? Nana has over 600 in the You ARE an Artist Clubhouse! You will enjoy our Fall video art lessons! (or access ALL of Nana’s video art lessons with her You ARE an Artist Clubhouse membership.)
Featuring You! You ARE an Artist!
So, paint your Acrylic Fall Trees Tutorial and be sure to share with us! Simply tag @chalkpastelart on Instagram, use the #YouAREanArtist hashtag, or upload a photo to the ChalkPastel.com Facebook page!
~I invite you to subscribe to Hodgepodge (it’s free!) Don’t miss any art lessons!
Would you have thought that fall leaves could be made so beautifully with wadded up paper towels? Click to comment…
-originally published October 2012
I LOVE this! Art is something we rarely do, but this is mandatory. 🙂
Yes, you must Ellen! Wadded up paper towels make a gorgeous crown of colors on acrylic trees. And the spattering – wow! (thanks)
Your six year old has some impressive skill there. These are all very beautiful. I used to paint a lot using the same types of paints when I was in high school but drawing and painting became mundane and a chore. Oil Pastels were always my favorite, but now that I have two small children I actually don’t want my hands dirty (isn’t that terrible)? I should really start showing them how to do things like this though and appreciate your post to hopefully motivate me. I loved seeing each piece of art by your family members! Nice!
Wowweee….love this! We will be doing this soon in our family as well. Thank you so much for the tutorial and inspiration!
This looks so fun! I can’t find the print button you mention though. Would love to print out the instructions!
I found it at the bottom now….yay!
Thank you for this wonderful tutorial. I would love to do it with my kids. I’ve never been to your site so I’m going to take a look around. 🙂
Hi!
Thank you for the tutorial. It looks like lots of fun! FYI–The printer friendly version is not working. It is just one page–kind of like a cover page.
Thank you for sharing!
Hi Lori! Thanks for your comment. I double checked the print friendly button and I was able to pull it up – it turns it into a pdf and then you can choose to print it: http://www.printfriendly.com/print?url=http%3A%2F%2Fyourbesthomeschool.com%2F2012%2F10%2Facrylic-fall-trees-tutorial%2F&partner=Shareaholic-Publishers I am using Firefox as my browser. It’s possible that it could be different in other internet browsers? Hope that helps!
I just found your amazing site yesterday and we did this today. WONDERFUL! !!!!! No impossible supply list! Teaching art is always laborious for me because I don’t think I’m good at it. Crafts? Bring it. Art that turns out as anything I’d want to keep….rarely! I and my three boys (ages 9, 6 and 3) used your fabulous tutorial after lunch as recommended and all of us made something lovely and THAT WE WERE HAPPY WITH! Using the paper towels was so freeing and it dovetailed perfectly with fall and our studies of Monet’s Impressionism. I can’t thank you enough for your sharing your gifts with others and am looking forward to enjoying many more of your tutorials.
Oh this had made my day Amanda – I love how you describe this tutorial as freeing and shared what fun you had! It is exactly what we hope all will find with our tutorials. ‘Doing’ art is fun and the more you do it, the more the doors open. Glad you will be enjoying more and thanks again for sharing.
We had such a wonderful time doing this art project as a family. Thank you for sharing!