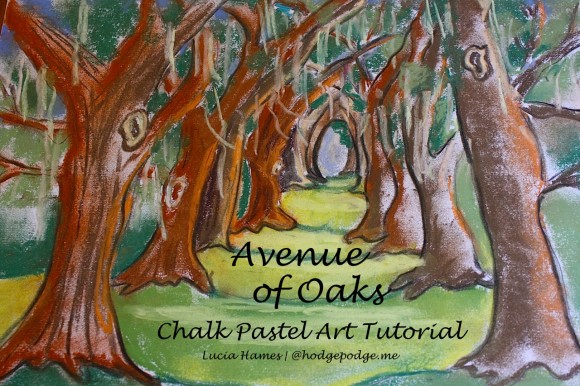
During this lesson, you will be able to visit a famous site on St. Simons Island, Georgia. For those of you that have never visited this barrier island off the coast, it is one of those dreamy, slow, humid places that are famous in Southern novels. You could pretend that this path or avenue leads up to a white columned mansion. In fact, this avenue lined with oaks led to what used to be the prosperous Retreat Plantation on St. Simons Island. You can still see the 160 year old trees – Avenue of Oaks – as the entrance to Sea Island Golf Club. My daughter and grand-daughter visited there recently and we agreed a follow up art lesson would be beautiful! An Avenue of Oaks Chalk Art Tutorial.
Avenue of Oaks Chalk Art Tutorial
For your painting you will need the following colors of pastels: medium brown, orange, dark brown, black, beige or tan, light green, dark green, light blue and medium blue. Please don’t be discouraged by the long list of colors, or by a painting that looks difficult. I will break it down into steps, It will not be so hard to accomplish.
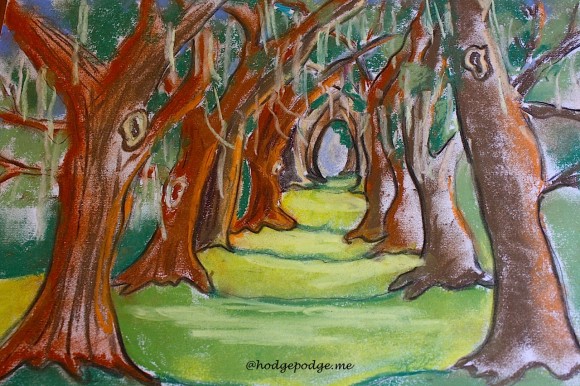
Let’s begin by starting with what I call the “anchor tree.” Turn your paper horizontally. Pick up your black pastel and draw your first tree on the left. It is a bit bigger and more distinct, and will be the tree that the viewer will see first. It will not have any green leaves in the branches yet.
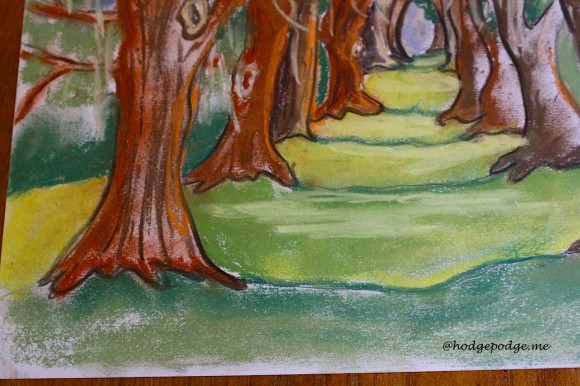
Take your medium brown and slowly outline the tree, then take your finger and smooth the color to the opposite edge of the trunks and limbs, filling in the color. This will be easier than trying to fill in the entire tree with color. The trees on this side of the avenue will be darker in color, as the light or sunshine will be on the right of your painting. Add your orange to the right side of the trees to emphasize that sunshine!
Continue with drawing the trees on the left of your paper, you can add “knot holes” or places on the tree where limbs have been trimmed off. These sort of give the tree a Halloween look, I think…bet that they look a little scary at night!
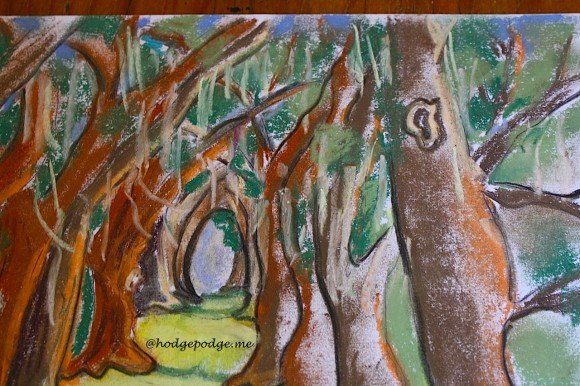
You can see that you have to make the trees smaller as you get to the end of the avenue. That is called “artist’s prospective,” and it is how YOU look down the avenue to the end. The trees bend together and come to a roundish circle at the end of the avenue.
The right side of the avenue is a “twin” to the left, with the same number of trees on that side, but they will be a lighter color because they are flooded with sunshine on the right side. I chose to outline all my trees in black to make them stand out in the painting.
Next, the poor trees need to be in the light green grass…not just hanging out in the middle of a white sheet of paper! If you look at the painting, you will see that the grass under the trees changes from dark green to lightest green the further the viewer looks down the avenue.
You may now add your green leaves in shades of dark green…just smooth in around the limbs and branches. Put some dark green bushes on the left to enclose the avenue. You can add “sky holes” in the the tree tops…just blue sky color in the trees to show what a bright and pretty day it is on the island.
The Spanish moss is the most fun part to add to your painting. Take your light tan or beige pastel, and put in your moss hanging from the tree limbs. It is just bold strips of color; you can have them sway to the right or hang down from the limbs. Just don’t overdo the moss…this is not a Christmas tree!
What a wonderful painting you have done! You have captured the look of a Southern avenue of oaks! Be sure to sign your name in the corner of the painting, flip it over and name the painting and date it. Great work, I am so proud of you!
And always, always remember…You ARE an artist!
More on St. Simons Island, Georgia
FEATURING YOU! YOU ARE AN ARTIST!
So, paint your Avenue of Oaks and be sure to share with us! Simply tag @chalkpastelart on social media, use the #YouAREanArtist hashtag, or upload a photo to the ChalkPastel.com Facebook page!
- A note on chalk pastels: Pastels are an easy, forgiving medium. Fun for children and adults alike! Details on the pastels and paper we use, how and where to purchase, and links to all of Nana’s other pastel lessons are here: 100+ Free Art Lessons for All Ages plus the video The Very Few Must Have Supplies for Chalk Pastel Art. A simple set is very affordable. Nana also teaches acrylic lessons.
- The practical aspects of a mess: Pastels are blessedly messy. We always have baby wipes close by to wipe hands. We wear something we don’t mind getting stained or don a smock.
Do you and your artists learn best with a video art tutorial? Find our Video Art Lessons at ChalkPastel.com!
Have you subscribed to Hodgepodge yet to get your exclusive, FREE, subscriber-only art tutorials?
Have you ever visited an avenue of trees?

I love that you are being inspired by your travels! This is such a beautiful place and I’m sure it is inspiring to relive it through the chalk pastel. Thanks for all you do Tricia and Nana!
It is an absolutely beautiful spot! And yes, it is so much fun to follow up travels with art – you are a wonderful example of that!
Beautiful art and photographs! I feel so inspired to learn more each time I see beautiful art like this. Thank you!