Here we are in February and I thought that a painting of cherries, in honor of President George Washington, would be a great way to pass an afternoon! A cherry chalk art tutorial.
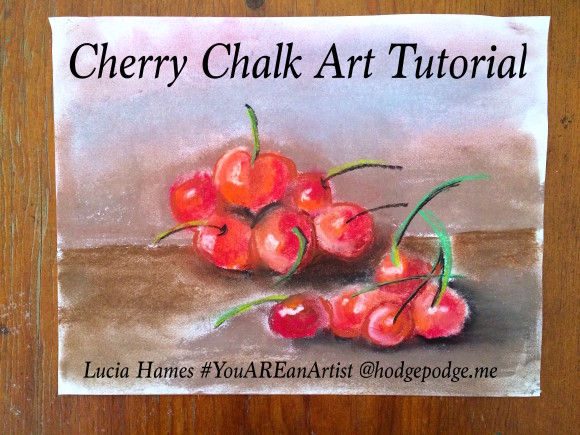
Cherry Chalk Art Tutorial
You will need the following pastel colors: bright red, dark red, brown, black, palest pink, spring green (light green) and orange.
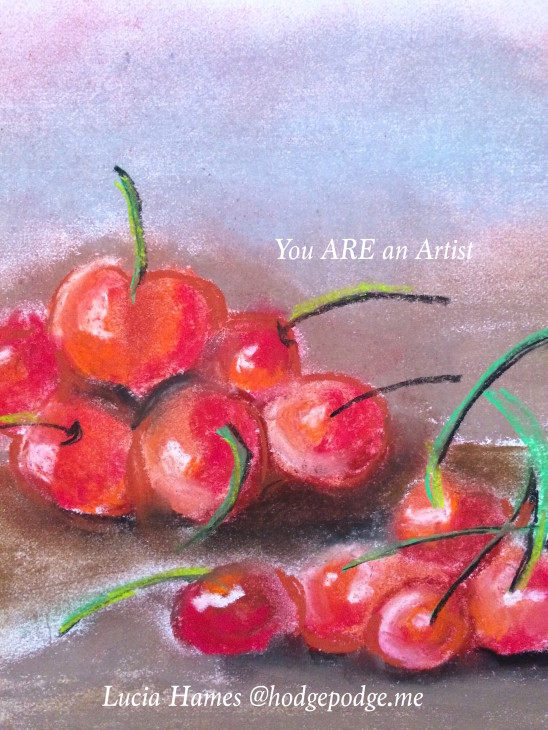
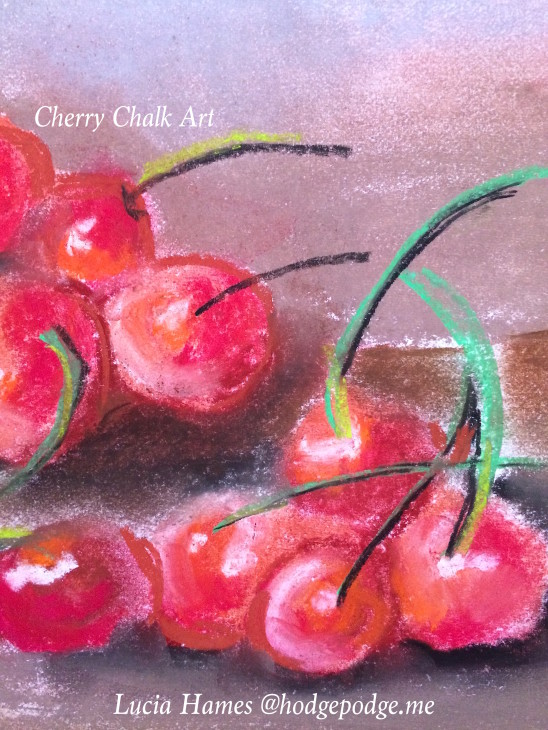
Cherries are quite easy to draw. Pick up your dark red and make a large, juicy circle. These cherries are arranged in a bunch, or cluster, and some overlap each other. Some of the cherries are back behind their friends. The cherry stems are all ‘crazy’ and going opposite ways – some stems up, some sideways!
Using your bright red pastel, make a few of the cherries brighter. You might grab your orange pastel and add just a stroke to show the light on the fruit – coming from the left side.
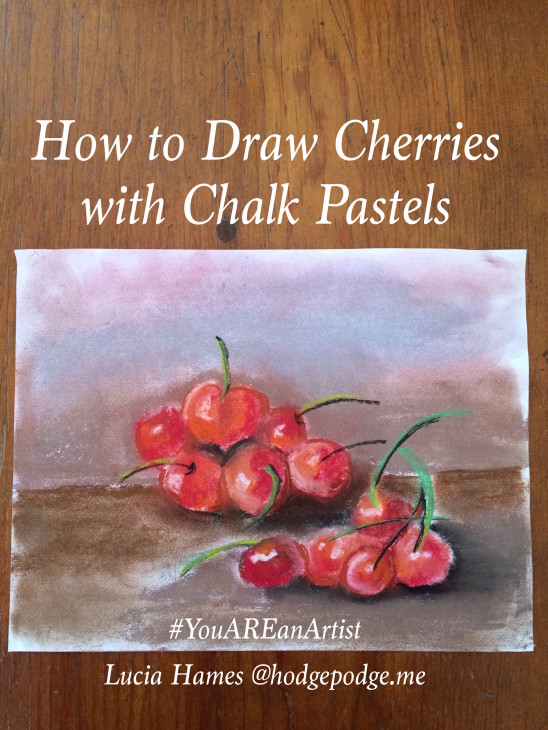
Before you go any further, you need to add your background. You can’t leave these delicious cherries hanging out in the middle of a big sheet of white paper! I chose a brown table top, the edge of the table goes behind the cherries. You can just brush most of the brown in with your fingers in and around the cherries. The edge of the table is darker and lightens up the closer to the viewer.
- Now go back to the wall behind the cherries and use brown – but very lightly. Smooth the brown in with your fingers.
- Back to the finishing touches of the cherries. Put some ‘dots’ of light on the curve of each cherry to show the light coming from the left.
- Take your black and put shadows under and between each cherry, and outline the bright green stems. Your pale pink can help define the curve of a few cherries.
- Don’t overwork your painting; it is done loosely and a bit impressionistic. Just a quick painting of “Washington’s Folly.” He cut down a cherry tree, so legend is told!
Wow! What a great painting you have done! I love your colors and the juicy fruit! Be sure to sign the painting in the corner, flip it over and name it and date it. And always remember – you ARE an artist!

Featuring You! You ARE an Artist!
So, paint your cherry chalk art tutorial and be sure to share with us! Simply tag @chalkpastelart on social media, use the #YouAREanArtist hashtag, or upload a photo to the ChalkPastel.com Facebook page!
- A note on chalk pastels: Pastels are an easy, forgiving medium. Fun for children and adults alike! Details on the pastels and paper we use, how and where to purchase, and links to all of Nana’s other pastel lessons are in Our Favorite Chalk Pastels. A simple set is very affordable. Nana also teaches acrylic lessons.
- The practical aspects of a mess: Pastels are blessedly messy. We always have baby wipes close by to wipe hands. We wear something we don’t mind getting stained or don a smock.
Do you and your artists learn best with a video art tutorial? Find Nana’s American Presidents and American History Video Art Lessons and more at ChalkPastel.com!
You might also like:
- Norman Rockwell Chalk Art Tutorial
- Cardinals in the Snow Chalk Art Tutorial
- Snowflakes Chalk Art Tutorial
- You ARE an Artist Clubhouse
-originally published February 2016
Love this chalk art! x