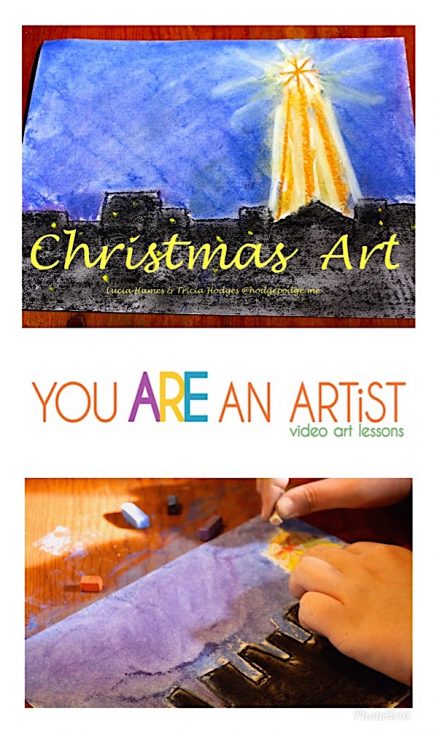
This lesson is a simple, yet a lovely one to celebrate the Christmas season. My students enjoyed the bright colors and the velvet blue night sky that we painted for our Christmas Star Chalk Pastel Tutorial.

Christmas Star Chalk Pastel Tutorial
The supplies are simple: we used regular copy paper, pastel chalks in black, yellow, orange, white, dark blue and purple.
He appeared and the soul felt its worth…

Begin with the outline of the city at night, using your black pastel. Draw irregular “roof” shapes, some short, some a little taller…it almost is like Halloween pumpkin teeth!

Then turn your black pastel on the side and fill in the buildings solidly. Use your finger to smooth the black until all the white is covered.

The Christmas Star is next: use your orange pastel and draw a straight line from north to south. Then put a line across making a cross. Another line diagonally across makes a sparkly star. Pick up your yellow and put a yellow circle around the outside of your star.

Your beautiful, velvet blue sky is added next. Turn your dark blue pastel chalk on the side and color the sky in; remember your yellow circle guards the Christmas Star, so don’t cross over the blue into the star area. Take your finger and smooth the blue until all the white paper is covered. You can add some purple to make the sky really dark, smooth it with your finger also.

Now we will finish the Christmas Star: It is best to take a paper towel or rag and clean the yellow chalk off from any other colors that may be on the yellow chalk. Carefully fill in as much of the white around the star as you can, it is ok to cover up some of the orange of the star.

Pick up your white pastel and make your star a “bold” and “strong” star with white accents. You can take a clean finger (if you have one!) and pull the yellow into the night sky.

If you remember, Bethlehem was very crowded that night, so take your yellow pastel and make some yellow dots on the dark buildings to show that there are a lot of folks in town that night!

Please know this: The painting is YOURS, and YOU can draw your Christmas Star Chalk Pastel and make it your own, the way you like it. I think you should put this drawing in the box with your Christmas ornaments when Christmas is over; be sure to put the date and your name on it, so years from now you can show YOUR family what you drew way back when!

Want to try Nana’s Christmas Star Video Art Lesson? Find her sample lesson on this page at ChalkPastel.com!
Now go paint with joy!
FEATURING YOU! YOU ARE AN ARTIST!
So, paint your Christmas Star Chalk Pastel and be sure to share with us! Simply tag @chalkpastelart on social media, use the #YouAREanArtist hashtag, or upload a photo to the ChalkPastel.com Facebook page!
- A note on chalk pastels: Pastels are an easy, forgiving medium. Fun for children and adults alike! Details on the pastels and paper we use, how and where to purchase, and links to all of Nana’s other pastel lessons are in Our Favorite Chalk Pastels.
- The practical aspects of a mess: Pastels are blessedly messy. We always have baby wipes close by to wipe hands. We wear something we don’t mind getting stained or don a smock.
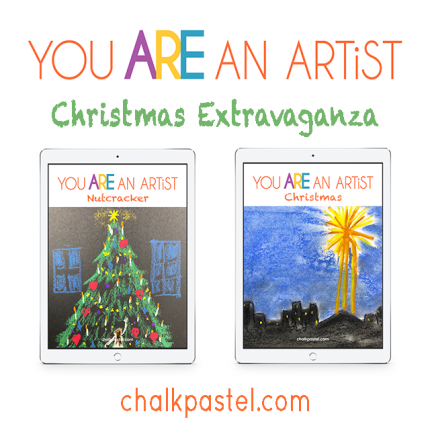
Do you and your artists learn best with a video art tutorial? Find our Christmas, Nutcracker and Preschool Winter Video Art Lessons at ChalkPastel.com!
—>> Subscribe to Hodgepodge so you won’t miss any future art tutorials! <<—
-originally published 2012
Tricia,
I have a spot for ‘art’ every day of this beautiful season. That spot is mainly dedicated to all of your great tutorials – allowing Nana to step into our home and teach us, too! Thank you for being such a gentle Titus 2 friend! You are a blessing – pinning and sharing your love with others.
I love this one! My youngest boys were looking over my shoulder when I first brought this up and they immediately knew what it was. It would make a lovely Christmas card. Thank you all for blessing us once again.
This is so great. I love how you post all the different examples of your children’s work!! I totally feel like pulling out my oil pastels and conte crayons for my boys…
Oh I hope you do get out those pastels soon! I do need to point out that this was done with chalk rather than oil pastels. And I’m so glad you found the finished pictures helpful – I think it’s important for all ages to be invited and included – no matter their skill level. Chalk pastels are especially good that way! Thanks Victoria!
I just wanted to pop in and say thank you for putting these lessons online for us! My kids have discovered a true love for pastels through this website!
I just made this one with my 6 year old, and they turned out so beautiful – he is so proud!
Thank you, and have a Merry Christmas!
Carrie – it is our joy to share these tutorials. And I love to hear how much you and your children are enjoying them. Merry Christmas! ~Tricia
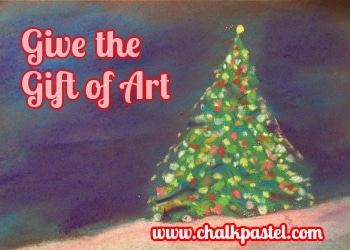
Thank you so much for these free tutorials! They stir up enthusiasm in all of us, just having the steps shown to us. And we LOVE this one and the nativity scene!! My children are going to make many to give as gifts. Even now, they are hustling to clear homework so we can begin our art time! I’m excited as well to try my hand at these lovely designs. Thank you again.
It is our pleasure, Jennifer! I think Christmas art is among the most fun – and beautiful – art to enjoy. You are going to bless many by giving your art as gifts. Cheering you on! Thanks so much for taking the time to comment and share. And, yes, you too must try chalk pastels. I think you will love them as much as your children. Merry Christmas!
Hi! Lovely art and I can’t wait to do this with my kiddos 💕
I have one quick question about storage for future years. Do you find that the chalk rubs & ruins the picture? I’m particularly thinking about little hands, pulling them out of the box & hanging them each year. Is there a special way to store them to keep this from happening? Do you think these could be laminated?
Hi Ashley – thanks for your question! Yes, we do know of families that have laminated their finished paintings. That is definitely one way of doing it. Nana also has a quick video explaining how to seal a chalk painting with a very light and quick coating of an aerosol (not pump) hairspray like Aquanet. You can find it here: https://www.chalkpastel.com/chalk-pastel-art-applying-fixative/