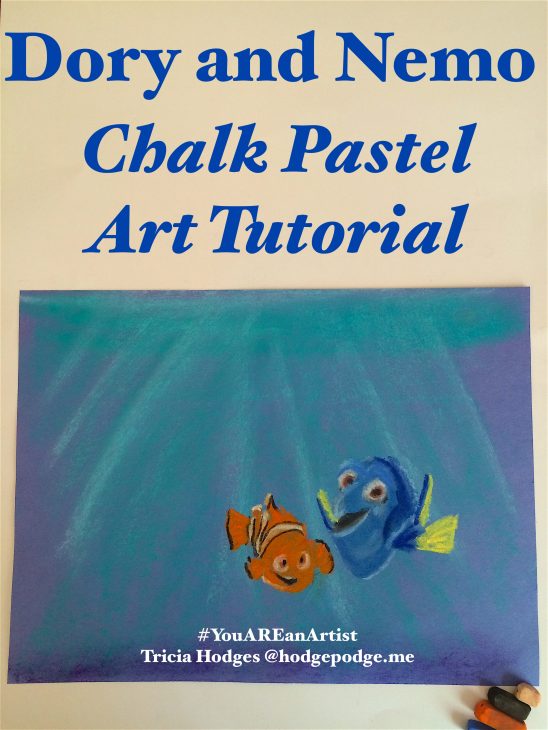
We are big time fans of Finding Nemo so you know that we are excited about Finding Dory too! Of course we love to celebrate with art so we are sharing a Dory and Nemo Chalk Pastel Art Tutorial. The rich blues of the deep ocean and, of course, Dory the blue tang fish. We even decided to add Nemo – don’t miss his orange in chalk pastels at the end!
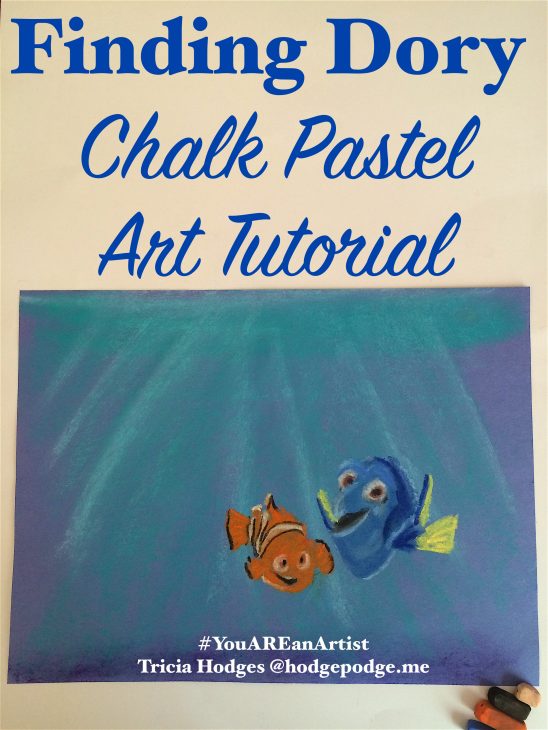
Finding Dory Chalk Pastel Art Tutorial
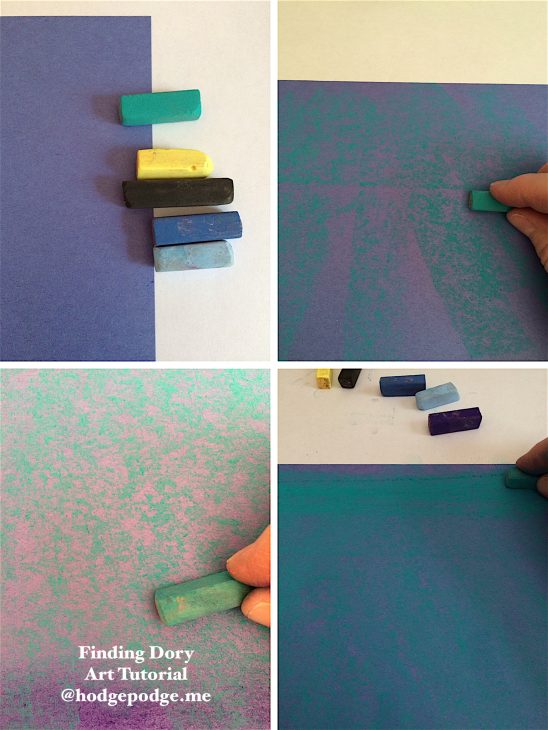
Chalk Pastel art supplies needed: blue construction paper, all the various shades of blue you have (dark, light, aqua, deep), maybe a greenish blue ocean color, purple for the deepest part of the ocean, black, orange and yellow.
You will start with your background. Turn your blue construction paper horizontally. Take an aqua blue or whatever ocean colored chalk pastel you have and turn it on its side. Skumble in some ocean color. Placing this color over your construction paper blue will bring your ocean to life! Start at the top of your paper and pull the color down to ocean floor. While you have your chalk pastel, skumble the top of ocean, the surface of the water, across the top of your page.
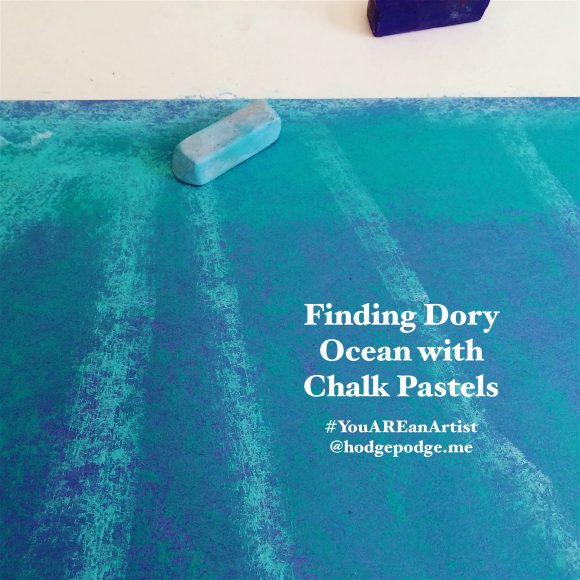
- Take your light blue chalk pastel and skumble some rays of light down through the ocean.
- Blend and smooth in the color with your finger. Then take your purple chalk pastel, turn it on its side and skumble in the deepest part of the ocean across the bottom of your page.
- Dory is going to be somewhat near the surface. You will sketch her in about halfway down your page and over on the right hand side. (Really, you are the artist, you may place her anywhere in your ‘ocean’!)
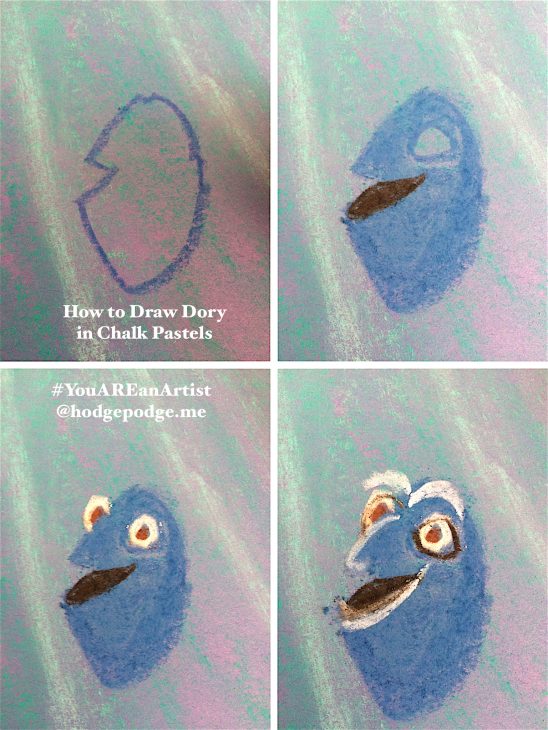
- Take your time sketching Dory. Chalk pastels are a little chunky and these details are all added within a small space. Start with your medium blue and draw Dory’s outline.
Now Dory is going to look a little like a muppet while you are placing her eyes, her mouth and her ‘eyebrows’ but you are going to layer colors to give her all those Dory characteristics. Notice the placement of the white chalk pastel. This is where the light from the water’s surface is falling on Dory’s face.
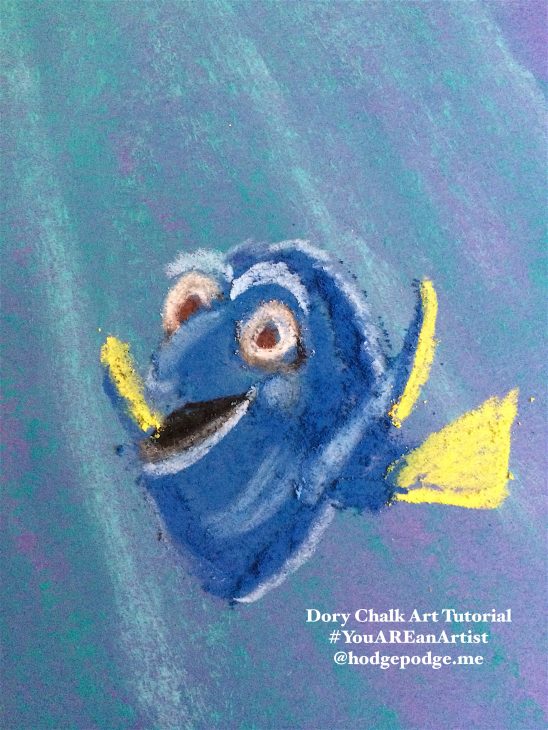
- Here is the part where I realized that Dory had some eyebrows that just weren’t right. We will fix the in a minute – just know they are important in the layering of colors. Next, take a darker blue and add those distinctive blue tang marks at the back of her head.
- Then take your yellow chalk pastel and add Dory’s fins. Use your finger to blend the yellow just a little then add yellow strokes for the details on the fins.
- Finally, take your Dory blue and go over her eyebrows. This makes her eyebrows more fish-like and adds depth to her face.
Dory and Nemo Chalk Pastel Art Tutorial
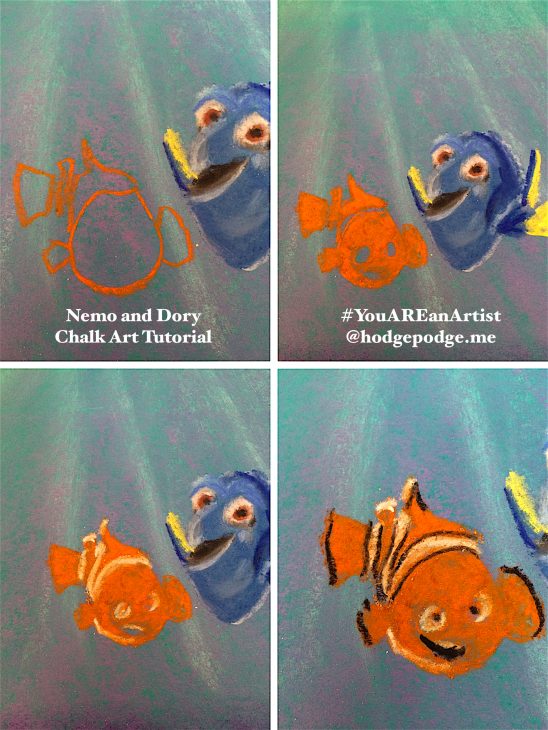
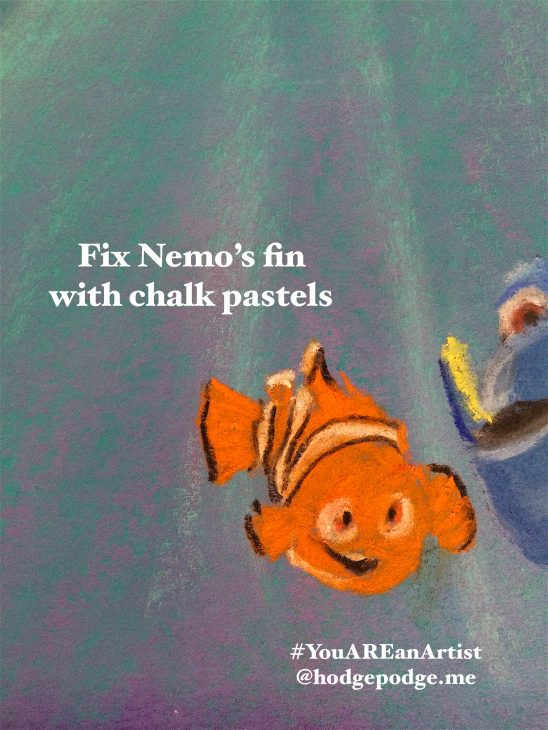
It is always more fun to have Nemo in the picture too! So, let’s add Nemo with your orange chalk pastel, step by step. Use your orange to sketch out Nemo’s shape. Take your time with Nemo’s tail and with leaving space to add the white stripes. Leave some ‘holes’ for Nemo’s eyes and mouth. **See the special note about Nemo’s fin, below.
- Dory’s smile is cheering you on! Next use your white chalk pastel to add the white stripes, the white of Nemo’s eyes and a bit of white on the tips of the upper fins. Two last stripes of white on Nemo’s belly and the top of his mouth.
- Finally, take your black and outline those white stripes, add Nemo’s mouth and outline each fin. A clown fish has an outline of black on the tip of each fin.
**Special note: I made Nemo’s fin closest to Dory just a little too wide. So I took my ocean blue and thinned it out on the bottom side. See, we fixed Dory’s eyebrows and Nemo’s fin by simply going over the area we wanted to fix with another color of chalk pastel! I love how forgiving and fun chalk pastels are.
Now wasn’t that fun?? I just love those ocean colors, don’t you? Be sure to sign your painting and display it on the family fridge because you ARE an artist!
More ocean scenes, blue tang, clown fish and ocean creatures in our Art at the Beach book!
Featuring You! You ARE an Artist!
So, paint your Dory and Nemo picture and be sure to share with us! Simply tag @hodgepodgemom on social media, send a photo via the Hodgepodge contact form here or post on the Hodgepodge Facebook page. We will be sharing these via the Hodgepodge instagram or on our Art Tutorials Showcase Pinterest board – or both! Nana will even comment on a few I am sure!
Free eBook and More!
- Get your FREE ebook (with a coupon)! Getting Started in Chalk Pastel Art.
- See how you can get started in just three steps! Watch the one minute You ARE an Artist video at chalkpastel.com.
- A note on chalk pastels: Pastels are an easy, forgiving medium. Fun for children and adults alike! Details on the pastels and paper we use, how and where to purchase are in our series, Chalk Pastels 101. A simple set of chalk pastels is very affordable. Nana also teaches acrylic lessons.
- The practical aspects of a mess: Pastels are blessedly messy. We always have baby wipes close by to wipe hands. We wear something we don’t mind getting stained or don a smock.
- Be sure to subscribe to our Hodgepodge YouTube channel for free video art tutorials!
Have you subscribed to Hodgepodge so you won’t miss any free art tutorials?
This is so cute and fun! I love how easy it is to fix something if it is not how we like it. I am so glad you post these tutorials. Our family has had hours of fun with chalk pastels and we would have never tried them without your guidance and encouragement. Thank you for all your hard work!