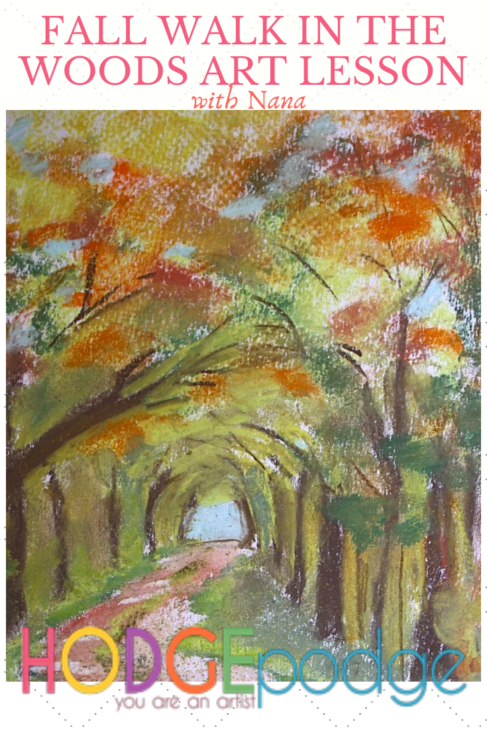
We thought it would be nice to enjoy our To The Woods Chalk Pastel tutorial again. But this time in fall colors. We’ve been enjoying some fall walks in the woods. And this is a perfect lesson in perspective. A Fall Walk in the Woods Chalk Pastel Art Tutorial.

Fall Walk in the Woods Chalk Pastel Art Tutorial
First, we gathered our chalks. Using a plain piece of printer paper (you can use construction paper or Canson paper), Nana showed us how to draw what looks like a mountain – our path. We used our brown pastel stick. Next, we drew the trees with a brown pastel stick.

Then, turning our sky blue pastel stick on its side, we skumbled the color above the trees. Finally, we blended the blue sky with our fingers.
Next, we used either a light gray or pale blue chalk to add sky color behind the trees. We also added the trees to our trees. Nana showed us how to do this by turning our dark green stick of chalk on its side and making a short mark – several times across each tree trunk. Make your green just slightly slanted toward the path below.
Make some small, circle type underbrush. Then blend it well with your finger. Next, add some dark green at the bottom of your underbrush, defining your path. Blend and ‘pull’ the darker color onto your path. This color gives your path depth and perspective.
We turn our attention to the trees once more before we finish up our path. Take your light green and add a few more ‘lines’ of leaves to your trees. Choose the fall colors you would like to add to your trees – oranges, red, yellows. Also place some light green undergrowth in your woods. This gives the impression of dappled light deep in your woods.
Now we get to fill in our path! Take a light brown. (We chose one with a bit of orange – to match the Georgia red clay). Turn the chalk stick on its side and spread that path.
Next, we use another shade of brown to give the path depth. To mimic sunlight filtering through the trees.
You might even want to use your white chalk to add touches of sunlight further down your path. We hope you enjoyed our Fall Walk in the Woods Chalk Pastel Art Tutorial.
Looking for video art lessons for all ages? Nana has over 600 in the You ARE an Artist Clubhouse – including a whole series of fall art lessons.
- A note on chalk pastels: Pastels are an easy, forgiving medium. Fun for children and adults alike! Details on the pastels and paper we use, how and where to purchase, and links to all of Nana’s other pastel lessons are here: Our Favorite Chalk Pastels
- The practical aspects of a mess: Pastels are blessedly messy. We always have baby wipes close by to wipe hands. We wear something we don’t mind getting stained or don a smock.
- Original To The Woods Chalk Pastel tutorial
What fall colors are you seeing around you?


Beautiful! Lorelai will love this.
Hi there, our community art group tried our own attempts of your great tutorial recently. You can see the results here: http://goirtineve.wordpress.com/2014/09/30/community-art-with-thomas-court/ Thank you so much for the inspiration!
Thanks SO much for sharing, Emily! What beautiful paintings – each so unique! I love the variation in color, perspective and more!
I’m delighted you looked at them, thanks again, everyone really enjoyed the project!
I,m from dominican repúblic, I don´t know english, but I want to say that it´s beatiful and I want to learn
so