Your BEST Homeschool

The art and heart of homeschooling

  • Facebook
  • Instagram
  • Pinterest
  • Twitter
  • YouTube
  • About Us
  • Art Lessons
  • Blog
  • Tricia’s Book
  • Homeschool
  • Recipes
  • Shop
Home » Blog » Tree Silhouette: A Pastels Tutorial

in Free Pastel Tutorials· HomeSchooling

Tree Silhouette: A Pastels Tutorial

We were admiring the maple tree in the backyard…

…noticing how beautiful the yellow leaves were against the gray sky.

Nana said she could show us how to capture the beauty of the tree in chalk pastels.

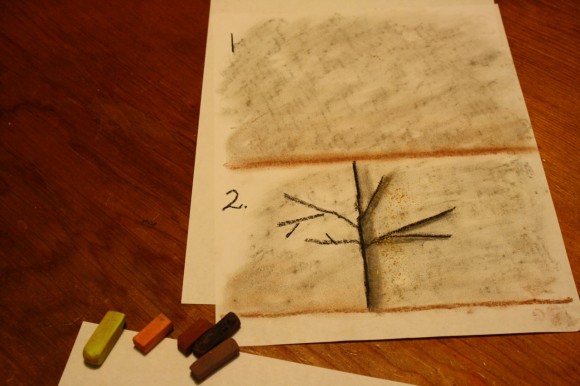
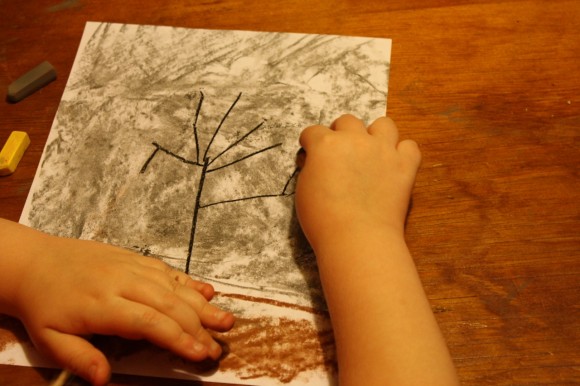
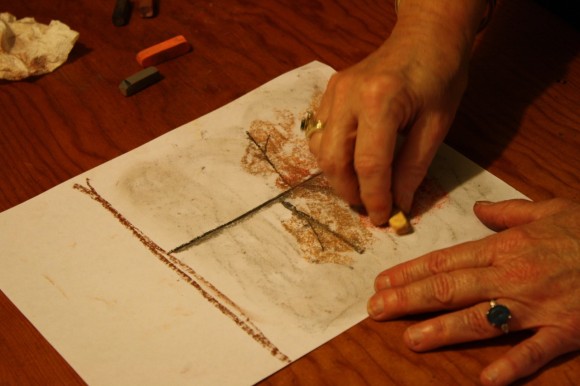
Using an 8 1/2 x 11 piece of paper, we drew the line for the ground about 3/4 of the way down the paper. We then turned our gray pastel stick on its side to skumble in the sky. Blending or ‘fisting in’ makes the sky overcast and will make the colors of the tree stand out.

Use a black pastel stick to draw your trunk and branches. Nana reminded us that tree branches usually do not match on both sides. Rather, they start at different spots on either side of the tree.

Next, we highlighted our tree silhouette with the gray pastel stick. Just on one side of the tree trunk and one side of the tree branches. This defines your tree.

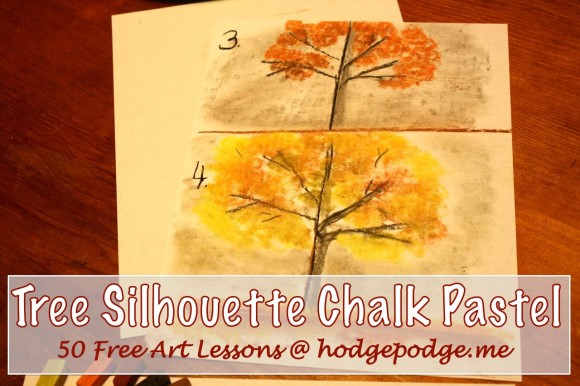
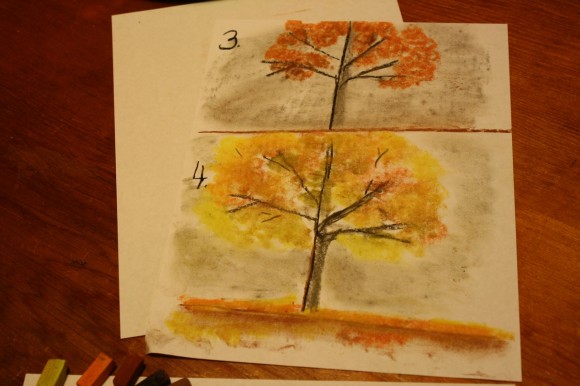
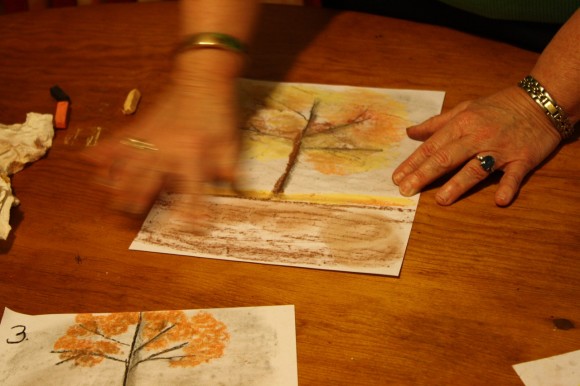
Now for some color! Take your orange pastel stick and skumble some leaves onto your branches. Not many, because, like our backyard tree, most have fallen off. Be sure to add your orange lightly so that the branches show well.

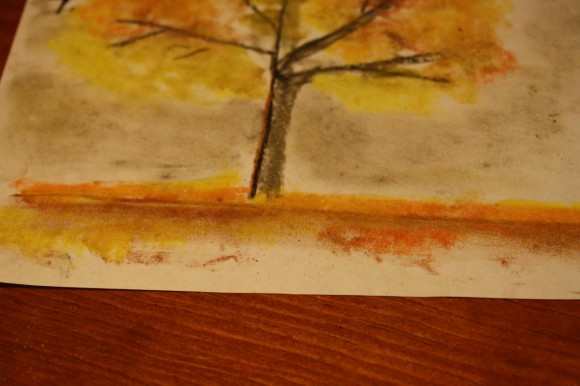
Add some color beneath your tree – on the ground – here and there. This will show that some of those brilliant, orange leaves have fallen to the ground.

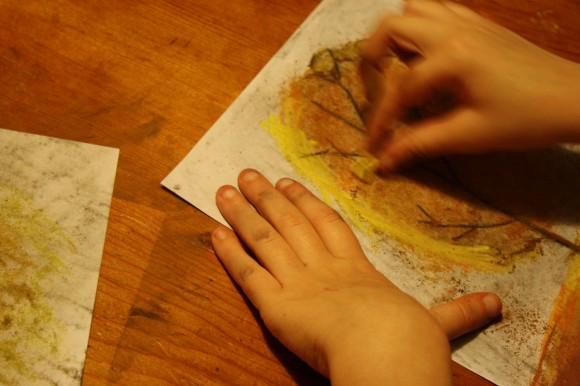
You’ll also want to get your yellow pastel stick and add some touches of yellow around the crown of the tree. Mainly on the one side of the tree the sunlight is hitting.

A nice follow up to our November World nature study.

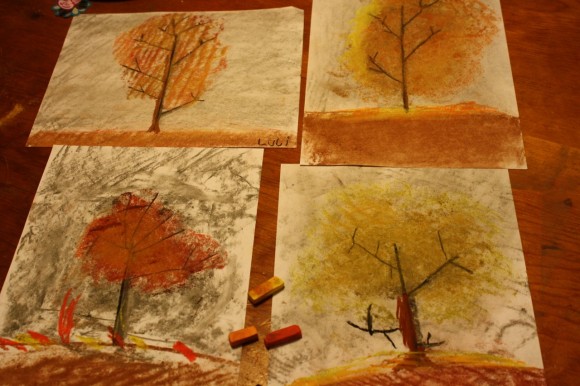
Our finished pictures: Top left – 14-year-old, top right – nine-year-old, bottom right – 12-year-old, bottom left – six-year-old.

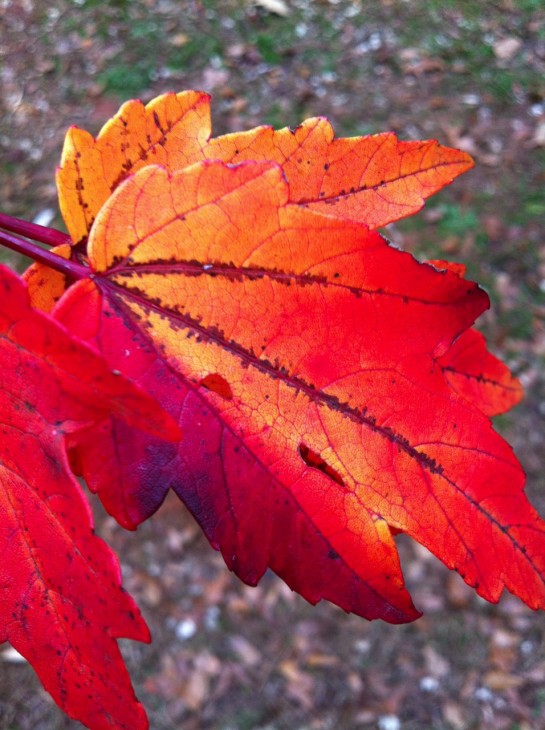
And just look the colors of our tree this week!

  • Print this lesson: Just click the green, ‘print-friendly’ button at the top, left of this post. You can choose to print the lesson with or without photos. By clicking the ‘remove photos’ box, you may print the text directions only.
  • A note on chalk pastels: Pastels are an easy, forgiving medium. Fun for children and adults alike! Details on the pastels and paper we use, how and where to purchase, and links to all of Nana’s other pastel lessons are all contained in the post Pastels plus links to tutorials. A simple set is very affordable. Nana also teaches acrylic lessons.
  • The practical aspects of a mess: Pastels are blessedly messy. We always have baby wipes close by to wipe hands. We wear something we don’t mind getting stained or don a smock.
  • Subscribe to Hodgepodge so you won’t miss a free art lesson!
Related

Filed Under: Free Pastel Tutorials, HomeSchooling Tagged With: art, chalk, children's, free, homeschool, lesson, Nana, pastel tutorial, pastels, tree silhouette

About Hodgepodgemom

Tricia faces a daily dose of chaos homeschooling five children. The biggest lesson she’s learned? At the end of the day – when the dishes are put away and the children are tucked in bed – truly what matters is each child’s relationship with the Lord. Raising children is a God-given privilege and, folks, the time is short.

  • Facebook
  • Instagram
  • Pinterest
  • Twitter
  • YouTube
Previous Post: « Candy-labra: Candy Cane Candle Holder
Next Post: November World »

Reader Interactions

Comments

  1. Heather says

    November 25, 2011 at 9:00 PM

    Oh how I wish we had our pastels on the road with us! It would have been the perfect project for us while visiting family.

    For sure we will try this one when we get home!

    Heather W

    Reply
    • Hodgepodgemom says

      November 25, 2011 at 10:10 PM

      Oh I love to hear it Heather! and I look forward to seeing your results 🙂

      Reply
  2. Bethany says

    October 5, 2012 at 10:38 PM

    We followed your tut and it worked wonderfully. Thanks!

    http://littlehomeschoolblessings.blogspot.com/2012/09/the-chalk-pastels-of-september.html?m=1

    Reply
  3. Doris says

    October 30, 2014 at 8:32 AM

    These are so lovely and all different ages can do this…….I plan to work on this art project with the kids this fall! Thanks for the tutorial!!

    Doris

    Reply

Leave a Reply Cancel reply

Your email address will not be published. Required fields are marked *

Primary Sidebar

Welcome!

Thanks for visiting! I'm Tricia and I've been homeschooling since 2000. I share the art and heart of homeschooling and help you bring joy, fun and freedom to your days. It’s a Hodgepodge! Read More…


Free Homeschooling Downloads


{FREE} Download, ebooks and subscriber-only art tutorials

Success! Please check your email to confirm your subscription.

There was an error submitting your subscription. Please try again.


Get Tricia’s book!


Save

Save

Save

Save

Save

Save

Save

Save

Save

Save

Our Sister Websites


Art for All Ages


Categories

Follow Tricia Hodges | Hodgepodge's board Best of Hodgepodge on Pinterest.

Recent Comments

  • Hodgepodgemom on How to Host a Jane Austen Movie Night for Homeschool Moms
  • Dawn on How to Host a Jane Austen Movie Night for Homeschool Moms
  • Hodgepodgemom on Mama Ann’s Morning Bars Recipe
  • Joy on Mama Ann’s Morning Bars Recipe
  • Hodgepodgemom on A Stitch In Time…
  • Contact us
  • Best of Hodgepodge
  • Parenting
  • Healthy Mama
  • Essential Oils
  • Recipes

Copyright © 2008–2025 · Your BEST Homeschool, a Southern Hodgepodge, L.L.C. site. | DMCA Notice