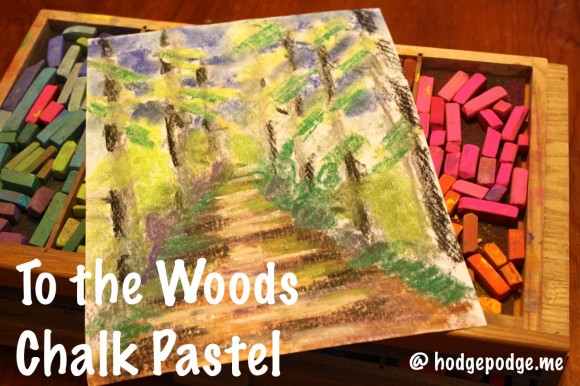
I have always loved a path or walking trail. I especially love spying the curve of the path up ahead and the promise of more to discover in the woods. We have several really great walking trails close to us. We even have our very own, short little curve of a trail through our backyard. So, when we enjoyed a mini-unit study of Henry David Thoreau, we focused in on nature and the woods – with an art lesson. Nana’s Henry David Thoreau To The Woods Chalk Pastel art lesson.
“I went to the woods because I wished to live deliberately, to front only the essential facts of life, and see if I could not learn what it had to teach, and not, when I came to die, discover that I had not lived.” ~ Thoreau
About Henry David Thoreau
We learned that Henry David Thoreau was a naturalist, author, poet and more. Here are a few more links for learning:
- About Thoreau from The Thoreau Society
- We particularly like ‘Observing Like Henry’ – from a free a pdf download Henry David Thoreau: The Making of a Naturalist – Walden Pond Reservation for Teachers
Read the best books first, or you may not have a chance to read them at all. ~Henry David Thoreau
- The Thoreau Reader – annotated works. Thoreau is best know for his work, Walden, which he wrote while living a simplistic life of solitude at Walden Pond.
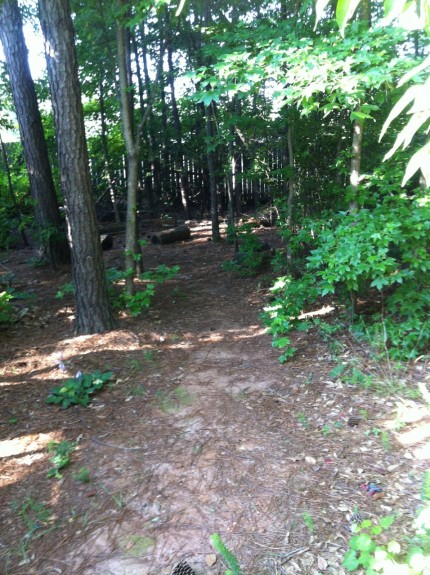
For our art project we focused on something dear to us. Our little walkway is one that the children’s uncle helped us clear. Now it is a well-worn path.
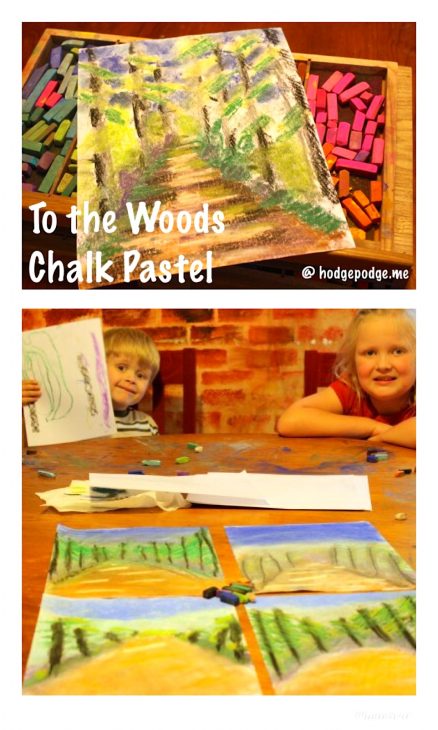
We asked Nana what would be best. She led us in a To the Woods pastel project. She looked at the above photo of our backyard and gathered supplies.
Thoreau To the Woods Chalk Pastel Art Lesson
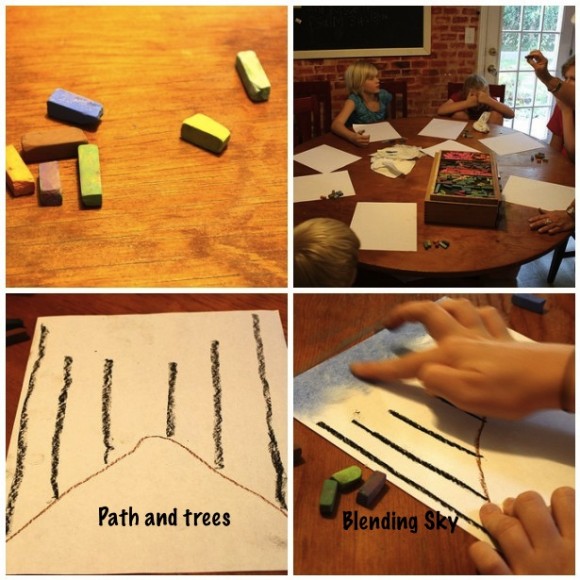
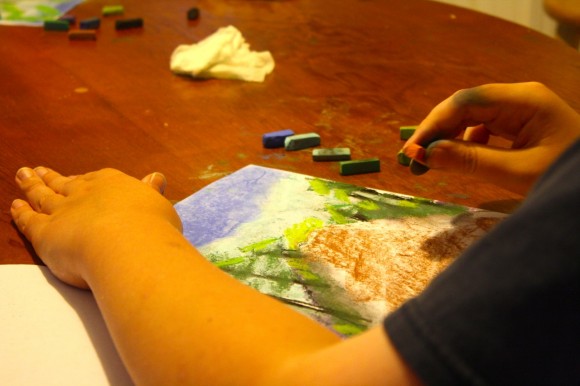
First, we gathered our chalks. Using a plain piece of printer paper (you can use Canson paper), Nana showed us how to draw what looks like a mountain – our path. We used our brown pastel stick. Next, we drew the trees with a black pastel stick. Then, turning our sky blue pastel stick on its side, we skumbled the color above the trees. Finally, we blended the blue sky with our fingers.
Next, we used either a light gray or pale blue chalk to add sky color behind the trees. We also added the pine needles on our trees. Nana showed us how to do this by turning our dark green stick of chalk on its side and making a short mark – several times across each tree trunk. Make your green just slightly slanted toward the path below.
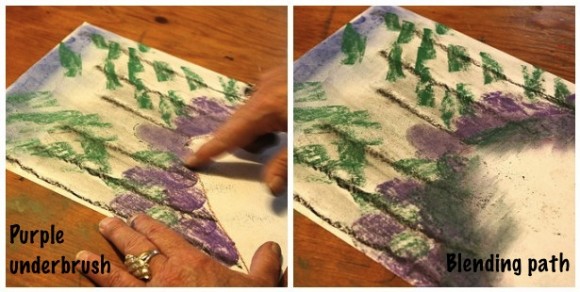
Purple underbrush? Yes, purple is a wonderful background color for our underbrush and path. Make some small, circle type underbrush. Then blend it well with your finger. Next, add some dark green at the bottom of your underbrush, defining your path. Blend and ‘pull’ the darker color onto your path. This color gives your path depth and perspective.
We turn our attention to the trees once more before we finish up our path. Take your light green and add a few more ‘lines’ of pine needles to your trees. Also place some light green undergrowth in your woods. This gives the impression of dappled light deep in your woods.
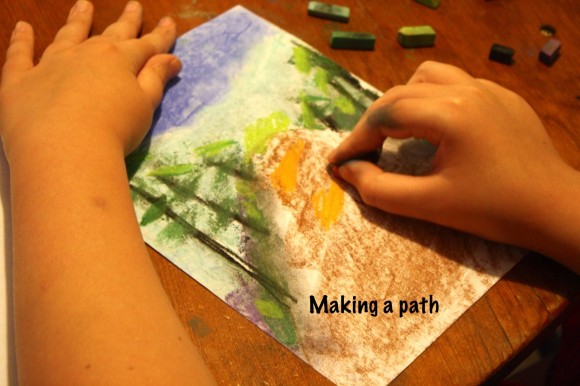
Now we get to fill in our path! Take a light brown. (We chose one with a bit of orange – to match the Georgia red clay). Turn the chalk stick on its side and spread that path.
Next, we use another shade of brown to give the path depth. To mimic sunlight filtering through the trees.
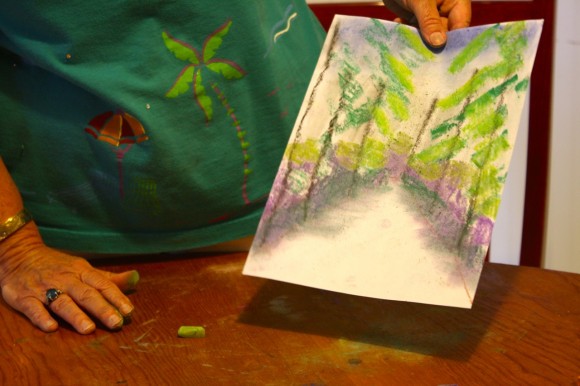
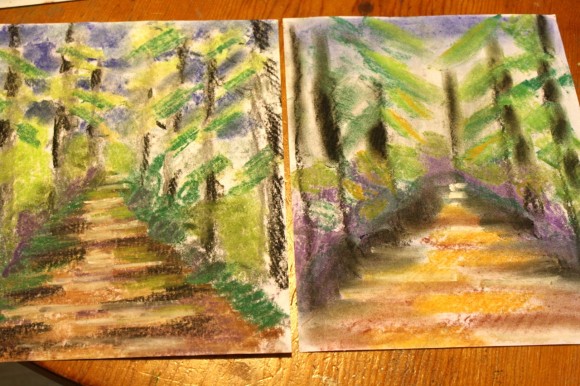
You might even want to use your white chalk to add touches of sunlight further down your path. See the difference in Nana’s two pastels? One she did before she taught the children, to give them an idea of what they were doing (on the left). One she completed as she was teaching (on the right).
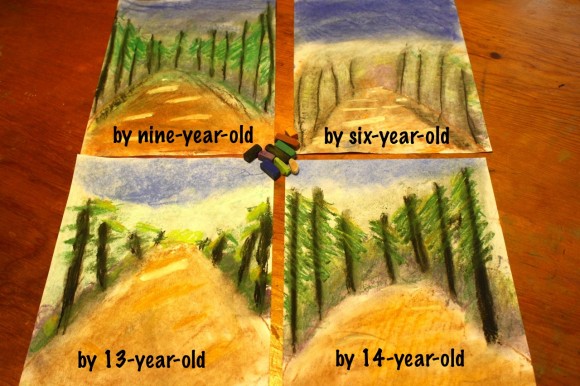
Here are all the children’s completed path pastels.
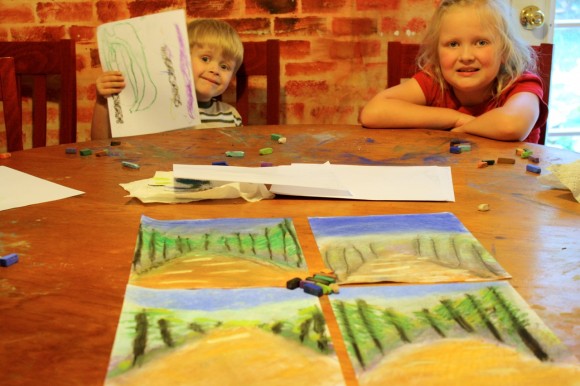
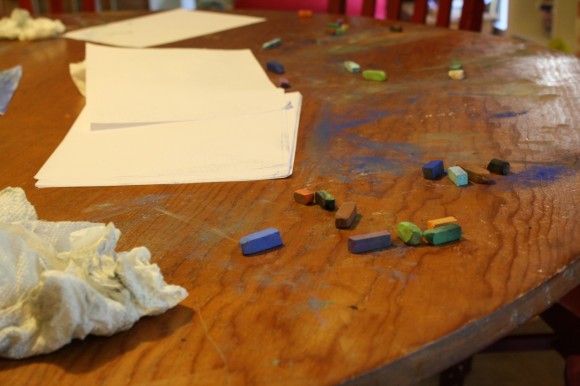
Plus, four-year-old joined in early on. He and big sister share their completed pictures. Do you see a bit of the pastels all spread out with our creating? Chalk pastels are blessedly messy.
Time to clean up!
“It is not enough to be busy. So are the ants. The question is: What are we busy about?” –Henry David Thoreau
(thanks to my friend, littlesanctuary, for posting that quote to Twitter.)
FEATURING YOU! YOU ARE AN ARTIST!
So, paint your To The Woods and be sure to share with us! Simply tag @chalkpastelart on social media, use the #YouAREanArtist hashtag, or upload a photo to the ChalkPastel.com Facebook page!
- A note on chalk pastels: Pastels are an easy, forgiving medium. Fun for children and adults alike! Details on the pastels and paper we use, how and where to purchase, and links to all of Nana’s other pastel lessons are here: 100+ Free Art Lessons for All Ages plus the video The Very Few Must Have Supplies for Chalk Pastel Art. A simple set is very affordable. Nana also teaches acrylic lessons.
- The practical aspects of a mess: Pastels are blessedly messy. We always have baby wipes close by to wipe hands. We wear something we don’t mind getting stained or don a smock.
Do you and your artists learn best with a video art tutorial? Find our Video Art Lessons at ChalkPastel.com!
< Pin it! >
Be sure to check out all the mini-units celebrating birthdays in July!
-originally published July 2012

This is such a great pastel lesson! I am inspired to do one on our upcoming camping trip to the redwoods…must pack my pastels.
Lovely quotes too. Thanks Tricia for the special treat this morning. 🙂
These are SO beautiful!! I can’t wait to do it!
These are beautiful — pinning this to be done SOON. This was such a great post, Tricia!
These came out so nice! Such a fun and beautiful lesson 🙂
Wonderful Christina! So glad you enjoyed it!
I wanted to thank you and Nana for this lesson. I used it today at our co-op class for One-point perspective drawings and they turned out really well. I let them make their own decisions about what materials and colors to use, and so they all turned out unique but beautiful. I will be posting a picture or two in my weekly wrap-up post tomorrow or Friday. Thank you both and hugs to you all.
Phyllis – thank you SO much for taking the time to comment and let us know you enjoyed this. I love how you said you let them each make their own decisions about the materials and colors – because we are each artists! Can’t wait to see photos. Hugs to YOU!!